How do I successfully transplant my seedlings?
A while back we shared tips related to starting your garden plants from seed. But, that’s just the first step on the road to putting food on the table. An important next step in the process involves transplanting those seedlings into the garden. This is one of the most significant and consequential processes in gardening and farming. All the time and resources put into growing seeds into healthy starts feels like a devastating loss if those starts die shortly after transplant. So, here are three quick tips to keep in mind this spring as you transplant seedlings into the garden.
Step One - Hardening Off
The hardening off process is more of an art than a science. The objective is simply to allow your plants to gradually adjust to the environment they will be growing in throughout the season. A key factor in this process is the difference between the growing environments of your garden and seedling nursery. Depending on your climate and the time of year, this difference may be dramatic or minimal. If the difference is minimal, hardening off may simply involve allowing the seedlings a morning outdoors before transplant.
But, in climates like we live in, where winter conditions often sneak well into spring, seedlings need to be well adjusted in order to stay healthy in the face of sometimes dramatic swings in temperature. Hardening off under these circumstances requires gradual adjustments over time. Let’s assume you are a home gardener and you start your seedlings in a warm corner inside your house with a nearby heater vent and/or south-facing window.
A gradual hardening off may start by simply moving your seedlings to the other side of the room so they are further from the heater vent. After a few days, you can move the seedlings outdoors in the afternoon for a few hours. If you experience dramatic shifts from daytime highs to nighttime lows, you may want to include a few days of leaving the seedlings outdoors for the entire day, but moving them in during the cool of night.
This gradual transition may take upwards of a week, but it significantly improves the plants’ resilience. Growing from seed requires planning and patience, and hardening off needs to be a part of the process.
Step Two - Healthy Plants Transplanted into Healthy Soil
This step seems like a no-brainer, but sometimes the obvious errors are easiest to make. If your seedlings are leggy, dry, or diseased they will be more susceptible to transplant shock or failure. So, make sure you maintain the health of your plants in the nursery and address any problems before preparing to transplant.
Assuming your plants are healthy, the next way to create transplant shock is to put the plants into an unhealthy soil environment. Excessive soil compaction or dryness is sure to shock small seedlings and inhibit their early root growth. And, nutrient imbalance obviously affects plant growth throughout its life-cycle. On the one hand, moisture is reasonably easy to plan for. Give the garden bed a generous watering immediately before transplant and ensure you keep the soil moist for the first 72 hours after transplant to give the roots the best opportunity to kickstart their growth.
On the other hand, compaction can be a bit deceptive. Two factors to consider are soil composition and the method of bed prep. Heavy clay soils with low organic matter have a natural tendency toward compaction. Amending with compost or an aerating material like vermiculite or perlite will help, or you can mulch the beds to protect the soil from the desiccating impact of wind and sun exposure.
The same interventions will help compaction caused by bed prep, but this problem should be managed through prevention. Not tilling is the best way to avoid creating compacted soil. Now, we’ll admit there are situations when using a tiller to prepare garden beds makes sense, often for the sake of efficiency. But, you will thank yourself anytime you use sheet mulching, broad forking, or raised bed design to prevent the use of a tiller.
If you find yourself having to use a tiller, do not be deceived by the immediate sense of satisfaction you feel when you see the soft, arable soil in the wake of the tiller. If that soil is not immediately mulched or heavily amended, it will quickly become desiccated once exposed to sunshine or wind. Unless the soil has very high organic matter content, you will find it turns to mud and begins to settle the first time you water. Each watering after that furthers the process of compaction and before you know it you have a hardpan surface and a withering plant. You’ll keep trying to water the plant, but most of the water runs across the surface of the ground or evaporates before it penetrates the surface. Again, a heavy layer of mulch can help the situation greatly, but avoiding tillage in the first place will serve to maintain the soil structure and greatly reduce the conditions leading to compaction.
Step Three - Don't Mess with a Good Thing
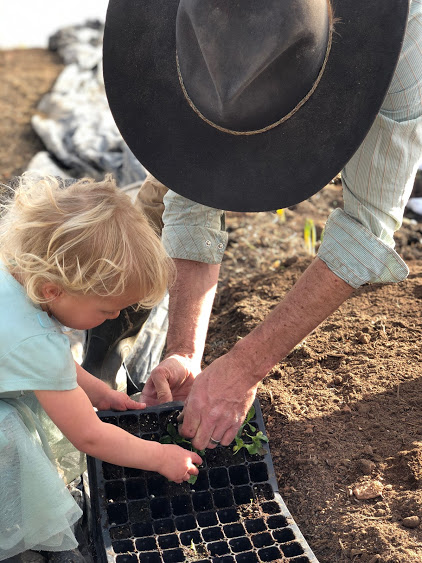
The final step is the actual process of transplanting. Whether from your grandparents or someone at your local garden shop, you’ve probably received advice on how to properly handle a seedling during transplant. There’s a good chance it involved breaking up the root ball or soaking the roots in some solution before transplant. And then of course there’s the process of digging the perfect hole. Maybe it’s supposed to be exactly three times the container you are transplanting from and deep enough to cover the stem up to the first set of leaves. Finally, once the plant is in the hole, there’s the all important process of filling around the plant and tamping just hard enough, but not so hard you smash the roots.
To be clear, all of that may help, but in most circumstances it is unnecessary. Our recommendation is to transplant with as little manipulation of the plants as possible. To accomplish this, focus on two things. First, remove the seedling from its container with as little disturbance as possible. If you use soil blocks or biodegradable material, you may simply pop the block out of the tray or plant the entire container. If you’re using repurposed materials (i.e. yogurt containers or solo cups) you can easily cut down the side of the plastic and gently remove it from the root ball of the plant. The process becomes a little more tricky if you are transplanting from a plastic seed tray. If you use seed trays a lot, it is worth the effort to make a homemade tray popper to efficiently remove the seedlings without tearing the roots or destroying the tray.
Next, with the soil moistened, simply place the plant directly into your garden bed in a hole just large enough to accommodate the root ball and move on. If your hole ends up slightly large, it may make sense to brush some soil around the plant to cover the roots, but tamping around the plant generally has no effect and, worst case, exacerbates compaction if it is something your soil is susceptible to, as discussed earlier. Whether you’re transplanting thousands of seedlings, or just a dozen in your backyard, the more efficiently you can get the plants in the ground and watered, the better. Your goal is to be so efficient, with such little disturbance, that the plants hardly realize they’re in a new growing environment.
After a thorough watering and a full day in the sun, the plant will discover the nutrients available in the soil and, rather than experiencing the transplant shock everyone warns of, the roots of your plant will immediately start soaking up those nutrients and you’ll see it growing even as soon as 48 hours after transplant.